
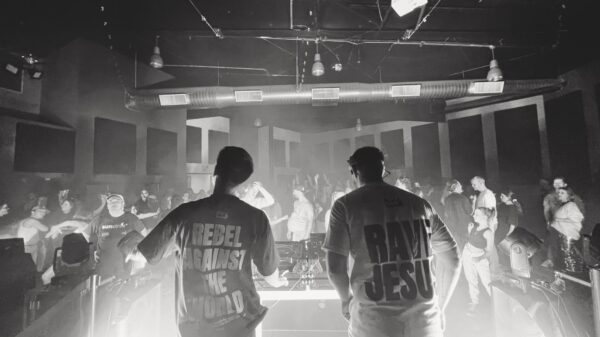

If you're a live streamer, it's only natural to want to spice things up a bit during your broadcasts. This is especially true if you want to expand your reach and draw in new viewers to your content.
Streaming multiple live video cameras at a time keeps your audience engaged and enthralled throughout your stream. Plus, it'll keep things entertaining! Instead of old, one-shot webinars, give your audience a more interactive viewing experience by setting up your streams with more than one live view camera.
But first, you need to know how to stream multiple live video cameras. The process is a little more complicated than you might think, especially as most streaming platforms, like YouTube and Twitch, don't have a “switch camera” option on their menus.
Fret not, however; this article guides you through everything you need to know to get started, from the gear required to the proper setup!
|
|
|
|
$599.00
|
N/A
|
$1,399.40
|
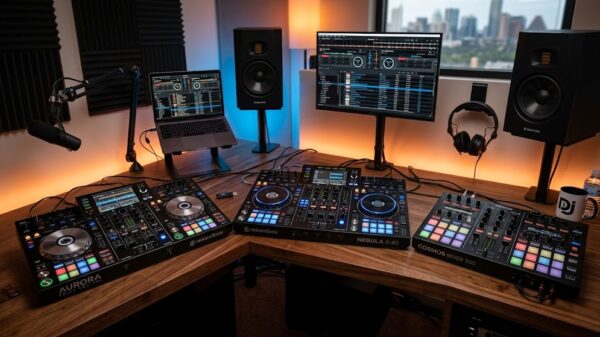
How to Stream Multiple Live Video Cameras: A Step-by-Step Guide
Running a live stream with multiple cameras doesn't need to be expensive nor overly complex. If you've been live streaming for a while, you probably have most of the equipment required already!
As long as you follow these eight simple steps, you’ll be able to stream multiple cameras on your next event.
Step 1: Prepare Your Cameras
The number of cameras, along with the camera's quality, all depend on your video's production value. Are you a professional streamer, or are you streaming just for fun? Maybe you have a dedicated fanbase and want to take your videos up a notch as a little treat. Or maybe you just want to try experimenting with multiple cameras.
If you're a professional or serious streamer, it's best to use high-quality cameras. Preferably cameras that can record in 4K. I personally use the following:
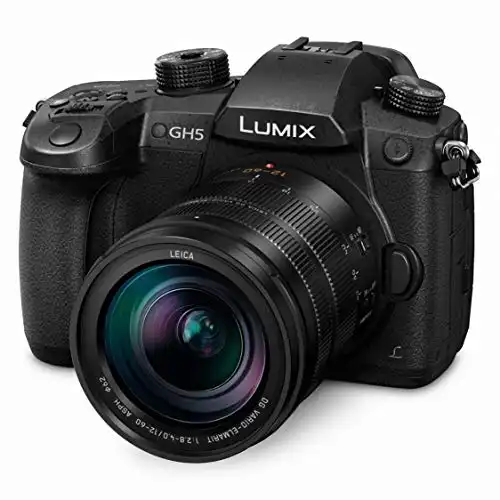
- Panasonic LUMIX GH5 4K Mirrorless Camera
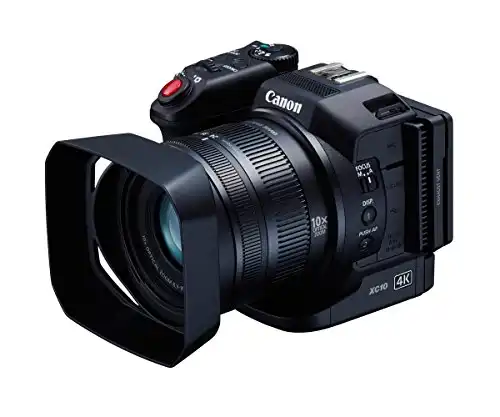
- Canon XC10 4K Professional Camcorder
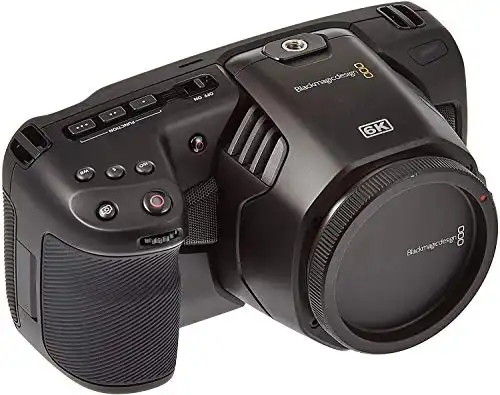
- Blackmagic Design Pocket Cinema Camera
- iPhone 12 Pro
You don't necessarily need more than two cameras. The number of cameras you use depends on how you want your stream to look. I usually record my streams in three separate angles. I only have my iPhone set up in case one of the other cameras fails. I found that to be the best setup for most occasions.
If you're a beginner or don't particularly want to spend thousands of dollars on new equipment, you can use the current camera you're using for your live streams and your smartphone's camera. You can also use your tablet!
The following are some of the best entry-level streaming cameras available, all of which are just under $150:
Step 2: Select Your Camera Angles
When setting up your cameras, make sure you have a wide shot, a medium shot, and a tight shot.
Wide Shots
Wide shots, also known as long shots, are used to establish your stream's setting and help viewers align themselves.
Usually, wide shots show the subject (or subjects) from top to bottom. Your wide shot can show the entire studio or most of the location’s background. The important thing here is that it captures you or your subjects as the focal point.
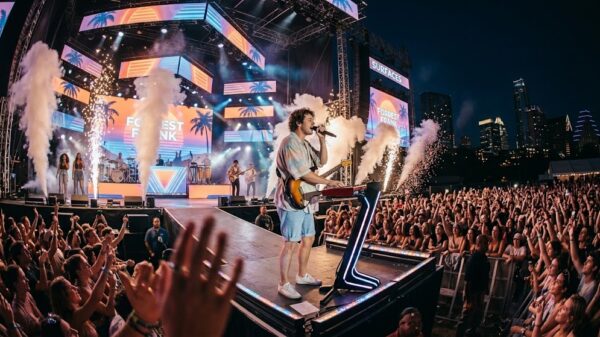
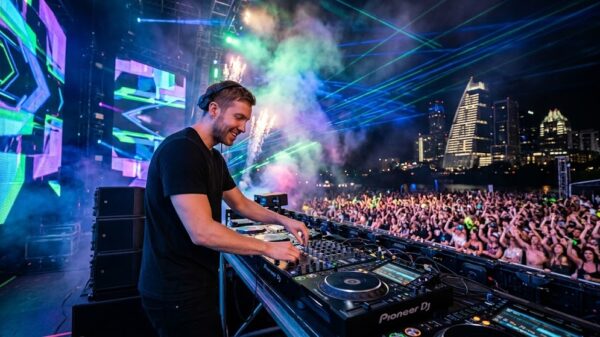
Wide shots are especially ideal for streaming concerts, live sports games, or anything that requires a large field of view.
Medium Shots
Medium shots are ideal for one-on-one interaction, especially if you're streaming with a partner or videoing two or three people at a time.
Typically, medium shots show a subject from the waist up and a bit of their environment. It's casual and relaxed. Medium shots are the most commonly used shots when live streaming.
Tight Shots
Tight shots, or close-up shots, fill the screen with the subject's head/face, therefore capturing their emotion and actions perfectly. Tight shots allow a single person to take center stage. This is what most gamers use, as most of their gaming streams depend on their reaction.
All mentioned shots are primarily used in cinematography. If you're a casual streamer who's not bothered about high-quality or professional production, place your cameras wherever you find suitable.
One of my favorite Twitch streamers, CohhCarnage, has a separate camera for his cat. She doesn't do much, only sleeps all throughout his streams, and yawns once or twice, but Cohh's streams wouldn't be the same without her! Using this example, I encourage you to find your signature and work with it.
Step 3: Set Up Your Sound and Audio
Audio and sound quality is just as important as camera quality. Even if your camera is top of the line, viewers aren't likely to stay if your audio isn't at least decent.
Similar to your camera equipment, your audio components will vary based on your budget and stream type. If you're performing a live concert for your audience, for instance, it's best to use Hi-Fi audio equipment so that it'll produce sounds as true-to-life as possible.
The same is said for professional podcasts, interviews, and even gaming.
If you already own a professional video camera, you'll only need a wireless or wired Microphone with a receiver and transmitter. But if you want to really level up your streaming game, you need an audio kit.
Audio kits include in-ear monitors, audio cables and connectors, intercom systems, and headphones. Two- or four-channel audio mixers also help with multiple camera streams.
A full set of audio equipment include the following:
- Microphone: Sennheiser Pro Audio Wireless Microphone System or Rode PodMic Dynamic Podcasting Microphone
- Shockmount: Auray DUSM-1
- Boompole: LyxPro SMT-1
- Audio mixer or audio interface: Allen & Heath ZEDi-10FX Hybrid Compact Mixer
- Headphones: Beyerdynamic DT 770 Pro
If you rely on your smartphone or tablet’s audio, you need at least two things: a microphone and an XLR adapter to plug the microphone in.
Step 4: Lighting, Lighting, Lighting!
Your lighting setup usually depends on where your camera is situated, but this isn't always the case with multi-camera lighting. This is primarily because you need to maintain visual consistency with all your camera shots.
One shot shouldn't be brighter or lower than the other unless that's what you intend for your streams.
Professional streamers recommend setting your lights in the same way you'd set up a sitcom or stage play. Placing the lighting from the ceiling guarantees even lighting and allows you to shoot wherever you want without the glare of the lights appearing on the camera.
Step 5: Mixers and Switchers Are Your Best Friends
Mixers and switchers are crucial in multi-camera streaming setups. These devices are what you'll use to independently control your video's audio and camera feed from multiple sources, along with live multi-camera switching.
There are two types of mixers and switchers available on the market today: hardware and software.
Hardware
When it comes to hardware, my personal favorite is the Yololiv YoloBox Live Stream Studio Equipment. This portable switcher comes with an encoder, a monitor, a recorder, and a playback studio that allows you to stream in full HD.
Its multi-camera capture gives you the opportunity to switch up to five video sources simultaneously. You can also add custom graphic layers if you wish.
If that's not enough, the YoloBox has a cross-platform streaming selection that gives you the chance to stream in three separate destinations with just a click of a button, including YouTube, Facebook Live, and Twitch. So, if you have dedicated audiences on YouTube who don’t have a Twitch account, you can stream your live event on both platforms using the YoloBox.
The YoloBox is compatible with every type of device imaginable. This includes DSLRs, drones, GoPros, USB cameras, DV, SD cards, and Android and iOS products.
The software interface is simple and straightforward. Plug in your camera equipment, add a prerecorded video from your SD card, and press “Go Live.” That's it! You can then use the touch interface to switch from one video to another.
More importantly, the YoloBox is supremely portable. It's about an inch thick and just over three pounds. It has a three-hour battery when not plugged in.
If you're searching for a professional switcher for your live streams, you can't go wrong with the YoloBox. It's great for beginners and professionals alike.
Software
If you'd rather do everything on your computer, a software interface might be a suitable solution for you. Wirecast and TVU Producer are brilliant software that aren’t only reliable but also filled with features.
These switchers allow you to quickly switch camera angles and apply graphics and effects seamlessly while you're on air. Log onto your Wirecast or TVU account, set everything up, and begin live streaming!
OBS (Open Broadcaster Software) is another great multi-camera streaming software. Similar to the above sites, OBS gives you the ability to switch and transition between up to eight different cameras using its Multiview feature.
Compared to Wirecast or TVU, OBS is completely free and can be used on as many devices as you like. It also has a ton of features that cater to your specific needs. Nearly every streamer on Twitch, YouTube, and Facebook Live use OBS, even big-name ones like Ninja and Shroud.
For smartphone users, consider checking out RecoLive MultiCam, Switcher Studio, and Teradek's Airmix app. These apps can stream multiple cameras simultaneously from your Android or iOS.
Step 6: Choose a Multi-Camera Streaming Platform
Once you have everything up and running, the next step is to choose a multi-camera streaming platform.
If you're already a live streamer, you probably already have a dedicated streaming platform. But it doesn't hurt to explore more sites and expand your audience reach. Here are some of the best live streaming platforms today:
- YouTube Live
- Facebook Live
- Vimeo Live
- Periscope
- Twitch
You also have cloud-based platforms that rely on a network of cloud services to deliver high-production content to their viewers efficiently. Examples include Dacast, Brightcove, IBM Video Cloud, and Kaltura.
Step 7: Test Your Internet Access
Even if you have the best equipment in the world, you won't be able to stream properly without decent internet access.
Your internet connection needs to have enough capacity to support multiple camera streaming at a time. This is especially true if you're planning to go live on different platforms simultaneously.
A wired network connection is recommended to get the highest bandwidth possible for your streams. Connecting it to WiFi may not be suitable, especially if you're recording in ultra-HD.
Once you’re connected to a decent connection, don't forget to test the speed before you go live. Your upload speed must remain between 3–5 Mbps throughout your stream to prevent any lagging or drop in quality.
Step 8: Final Touches
Before going live, you need to create a charming “Going Live In…” and “Thanks For Watching!” graphic layout.
This is optional, of course, but it'll make your streams so much more viewer-friendly and interactive! You might also want a picture-in-picture layout that shows your feed from the switcher.
You can likewise add post-event graphics on the screen once the stream ends. Here, you can include a call-to-action or attach any kind of ad or merch that you might want your viewers to buy.
Once you have all these final touches set up, you're ready to start streaming!
Why Stream with Multiple Cameras?
Multi-camera live streams are becoming more popular than ever. More and more big-name streamers take advantage of multiple camera angles to improve their production quality.
Here are some of the biggest advantages of multi-camera streaming:
Fun Viewing Experience
One of the biggest reasons why a streamer uses multiple cameras is to make his or her streams more engaging and enjoyable to watch. Relying on a single angle limits a streamer's creativity and content. Plus, constantly having to stand and move the camera around to show their viewers what they're doing gets tiring and annoying fast.
Additional camera angles allow you to cut from a close-up shot to a wide shot, which then keeps the stream playing flawlessly without any interruption in between.
Better Production Value
When you're streaming with multiple cameras, you'll be able to choose the best possible footage from several angles. This is especially important if you're streaming a lively Q&A, a two-player gaming session, a live sporting event, or a particularly fast-paced debate. The same is said for interviews, live music performances, and how-tos.
Edit Flexibility
Streaming with more than one angle allows you to easily edit your video once your stream is over, which you can then upload to a video hosting website like YouTube.
Since you're working with more than one camera angle, you have more creative freedom to edit and cut the scene to your liking. If you've already added transitions between camera changes, you won't have to manually add them yourself in the editing process, thus saving you more time.
Challenges of Multi-Camera Streaming
Despite all the advantages of multi-camera streaming, there's a handful of challenges, too. Here are some of the most notable ones:
Higher Equipment Requirement
If you want to stream with multiple live video cameras, you need more than one camera. There's no going around it. You also need an appropriate switcher that's up to the task. Let's not forget audio and lighting, as well! These types of equipment add up.
If you're a professional streamer or simply want to provide great content to your audience, you need to spend $1,000 on equipment alone at least. Cameras are expensive, as with switchers, audio, and lighting!
Longer Setup
Most of the time, I stream with just one camera. Why? Because setting up all the equipment required takes a long time!
Along with placing the appropriate lighting, I'd also have to set up the cameras and connect them to external hardware. Then, I'd have to use the correct software and audio. Setup alone takes me at least 30 full minutes.
For single-camera live streams, all I do is go to Twitch and press ‘record’!
Storytelling
The more your cameras, the more complex your stream. Live streaming with multiple sources requires you to fully pay attention to everything that's happening on all the cameras. You need to be fast and decide which shot to switch to at any given moment—that, and paying attention to your actual stream and audience.
A multi-camera live streaming event requires you to be your own director and technical and audio engineer. You'll also need to do the work of two or more camera people. Let's not forget the encoding you'll have to do in between!
Things get easier if you have a small staff doing the switching for you. Even so, he or she must be quick and understand which angle is best for any particular event. He or she needs to deal with a decent chunk of data, which might make it quite challenging at times.
Wrap Up
Live streaming with multiple live cameras adds a professional touch to your live streams. Not only do they make your stream fun and enjoyable to watch, but they’ll also boost the production value of your broadcasts!
I hope this post helped you understand the basics of multi-camera streaming and gave you an idea of what equipment you need to get started. Good luck, and have fun streaming!
More Buying Guides
- Best Bluetooth Speaker For Bicycles
- The 7 Best NFT Displays For Digital Artworks
- The Best Subwoofer For Cars
- Best UTV Sound System
- Best Closed Back Headphones
- Best Church Sound Systems
- Best DAW for EDM
- Best DAW for Hip Hop
- Best DJ Headphones
- Best DJ Software
- Best Earplugs for Concerts
- Best Electric Drum Set
- Best Mixing Headphones
- Best Laptops for DJing
- Best Laptop Stand for Musicians
- Best Production Software
- Best Smart Speaker
- Best Studio Desks
- Best Studio Monitors
- Church Live Streaming Setup
- Best Wireless In Ear Monitor System
- Best Speakers For Garage
- Best USB Audio Interfaces for Recording Vocals
EDM Sauce participates in various affiliate marketing programs, which means we may get paid commissions on editorially chosen products purchased through our links to retailer sites.